Google Analytics
While you can use the template editor to insert your own GA script tag in the header, our native integrations are designed to provide more accurate enhanced e-commerce data.
Google Analytics ships with two different versions, so we have different integrations available.
Google Analytics 4 (GA4)
This is the latest version of Google Analytics. To set it up you'll need to enable the integration in SPP and provide your Measurement ID. You can find it in GA4 Admin → Property → Data Streams → Web.
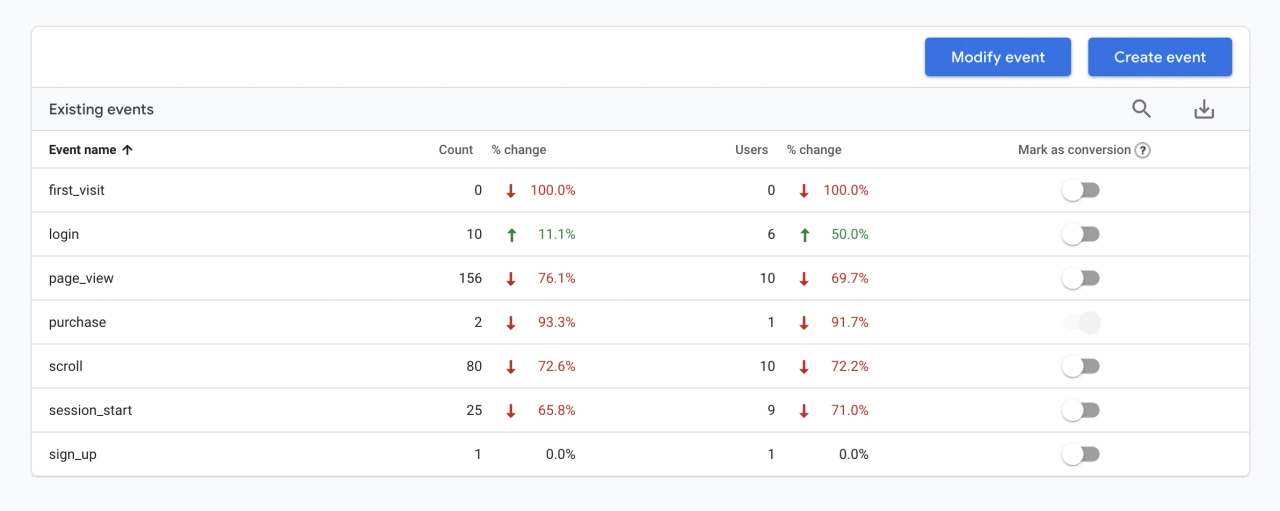
The integration will automatically start sending pageview and purchase data without any additional setup. Every time a client makes a payment and lands on the receipt page, we send the purchase event, along with the purchase total and currency to GA. We also send sign_up and login events which may be useful.
Cross-Domain Tracking
When a customer navigates from your domain (example.com) to your order form on your workspace domain (clients.example.com or example.spp.io) Analytics will generate a new session and count them as a new user, which isn't ideal.
Enabling cross-domain tracking allows us to preserve customer’s sessions across domains and helps attribute actions on your website and purchases on SPP to the same visitor.
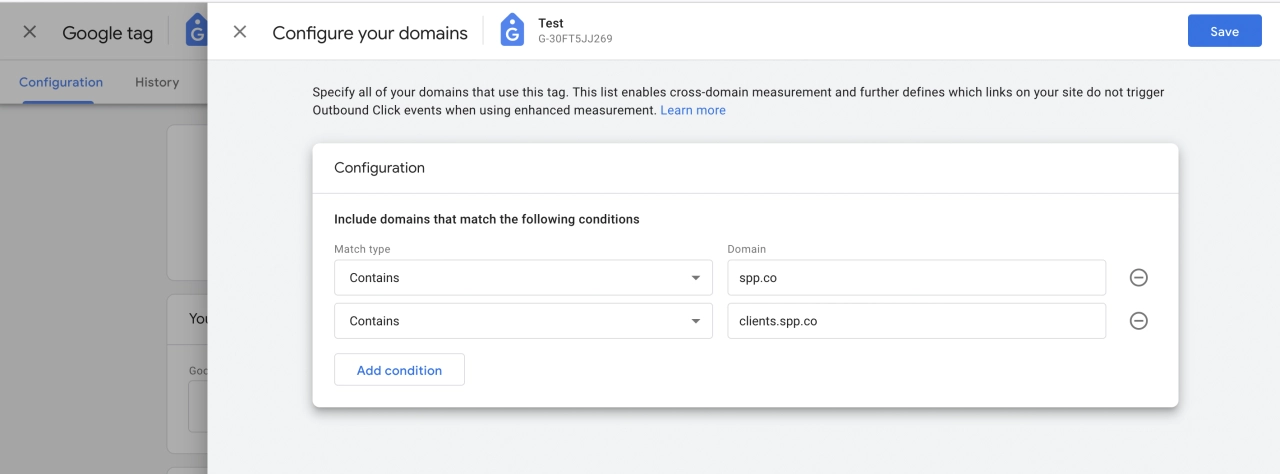
Here's a guide on white-listing your domains in the GA4 dashboard.
Universal Analytics (UA)
This is the legacy version of Google Analytics. To set it up you'll need to enable the integration in SPP and provide your Analytics ID. You can find it in GA Admin → Property → Tracking code.
Our UA integration uses the server-side API to send E-commerce events to GA. So as long as you have enhanced e-commerce tracking enabled in GA, you will start receiving those events without any additional setup.
Conversion tracking
To visualize the conversion funnel in Google Analytics you’ll need to set up a conversion goal.
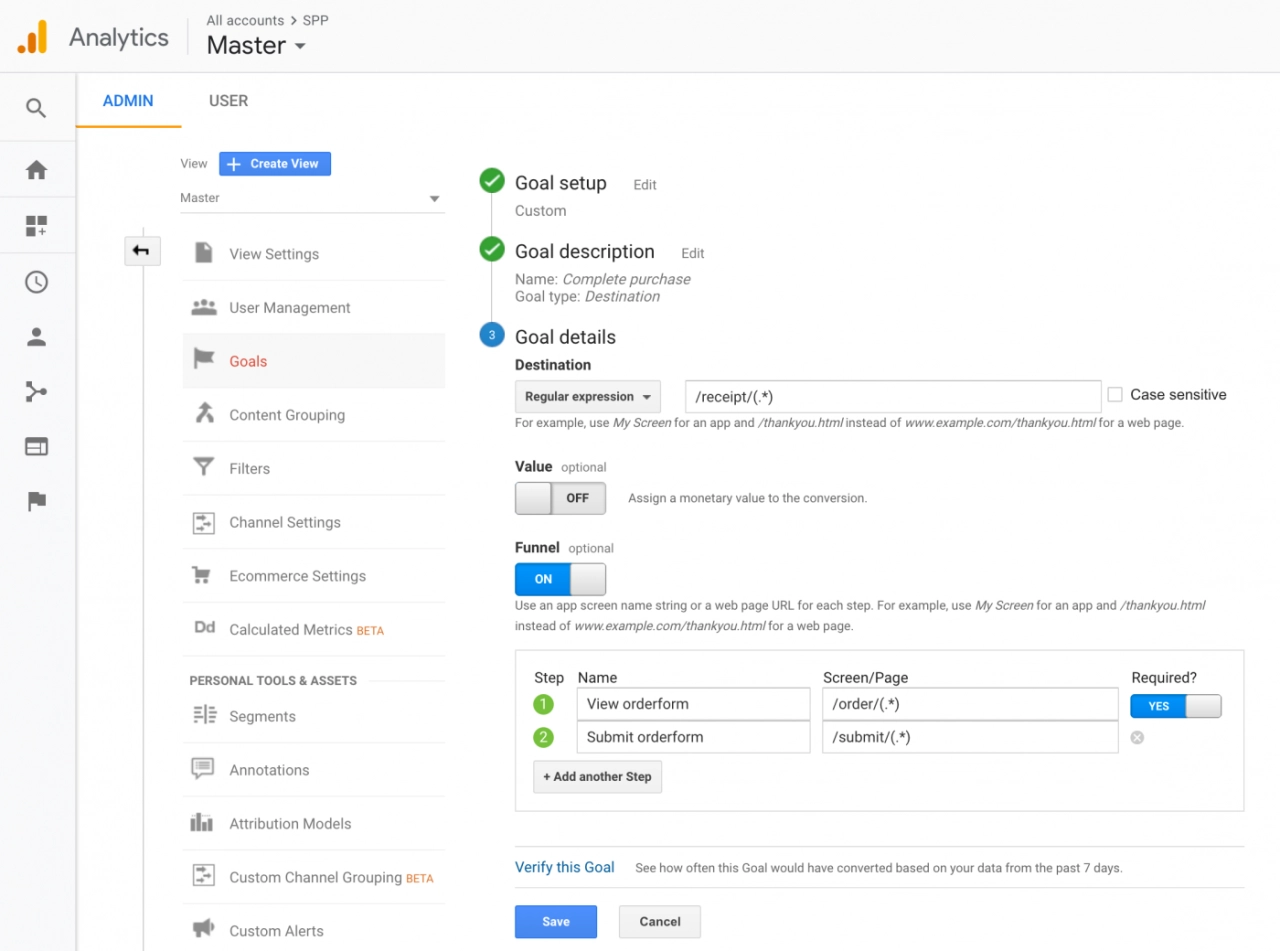
In Google Analytics go to Admin → Views → Goals
Click + New Goal
Enter the following values and click Continue:
Name: Complete purchase
Type: Destination
Enter the following values and click Save:
Destination: (Regular Expression)
/receipt/(.*)Funnel: On
Step 1:
Name: View orderform
Screen/Page:
/order/(.*)(note that you can also track a specific form here, e.g./order/service-packages)Required: Yes
Step 2:
Name: Submit orderform
Screen/Page:
/submit/(.*)
Cross-Domain Tracking
Here's how to enable cross-domain tracking in Universal Analytics:
gtag('config', 'UA-XXXXXXX-Y', {
    'linker': {
        'domains': [
            'clients.example.com',
            'example.spp.io'
        ]
    }
});
Note: this is a change you need to make to the tracking code that runs on your marketing website.